Lessons Learned: The Deadhedge Grows
Our deadhedge has grown by leaps and bounds over the past few months. And so, we thought it was time to share a little knowledge gleaned from its construction. So, brew a cuppa and let us take you along on our little journey.
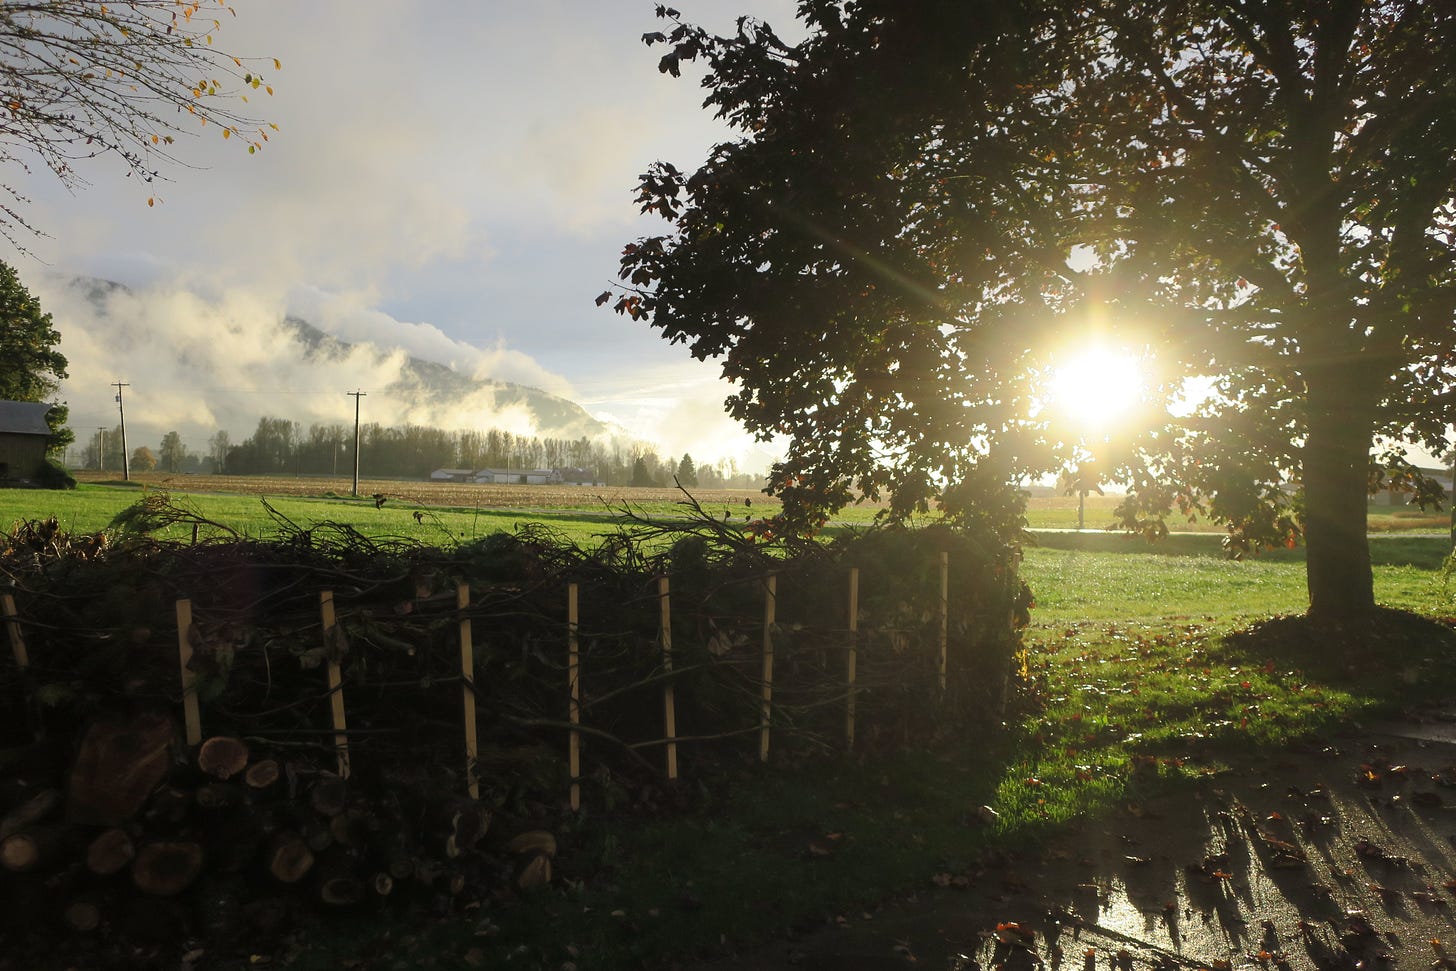
back in June, we took on a new property. One that was overgrown with mature trees and shrubs. They had all been planted decades ago and left to form a dense mat of vegetation. And, since we specialize in naturalistic and low maintenance landscape design, it felt appropriate to take on the challenge of clearing it in preparation for some sand beds (a la Peter Korn) . It felt like a great way to start out. A chance to test some of our eco-friendly ideas and try to use the biomass in the best way possible.
Our ultimate solution was to start a deadhedge; a hedge-like structure built from all of our excess twigs, branches and even a few old boards. It’s a simple solution but it checked off all of the right boxes. We kept all of our green waste on site, saving the cost of hauling it away and sequestering any carbon that would have been lost through burning. Plus, it created habitat to replace the shrubs and trees that were removed or cut back.
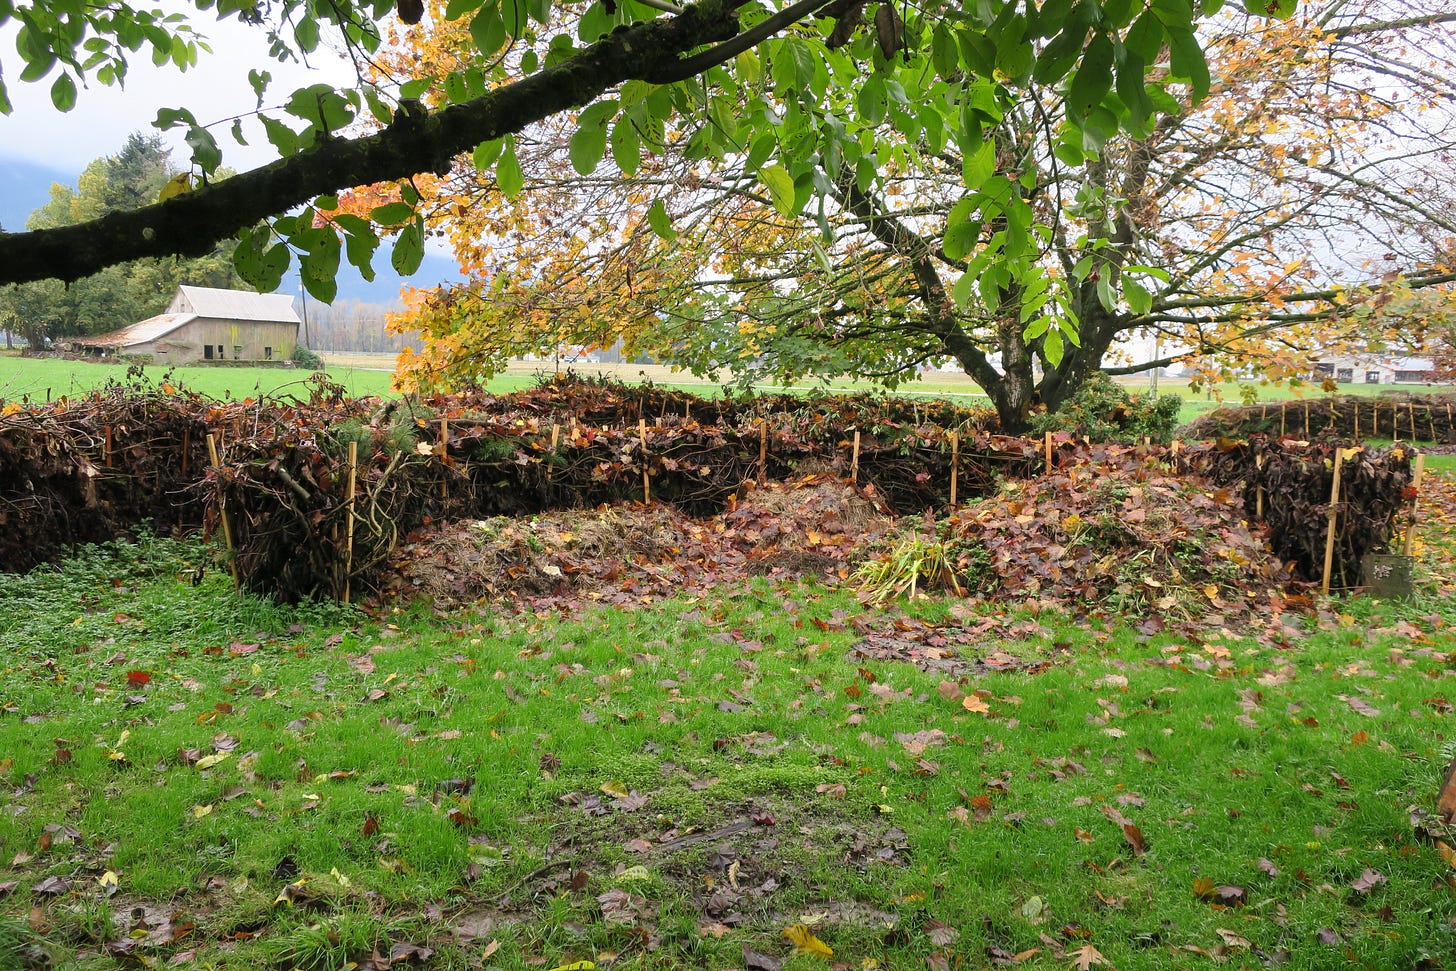
It also adds a structural element to the larger landscape. A low fence-like barrier to create separation between areas of the farm. As well as a natural sinuous form, both accentuating and connecting the curves of the large tree canopies that dot the homestead. So that the deadhedge not only guides you through the space, but frames more than one beautiful view along its route. Helping us to borrow from the lush river valley and mountains beyond the property lines.

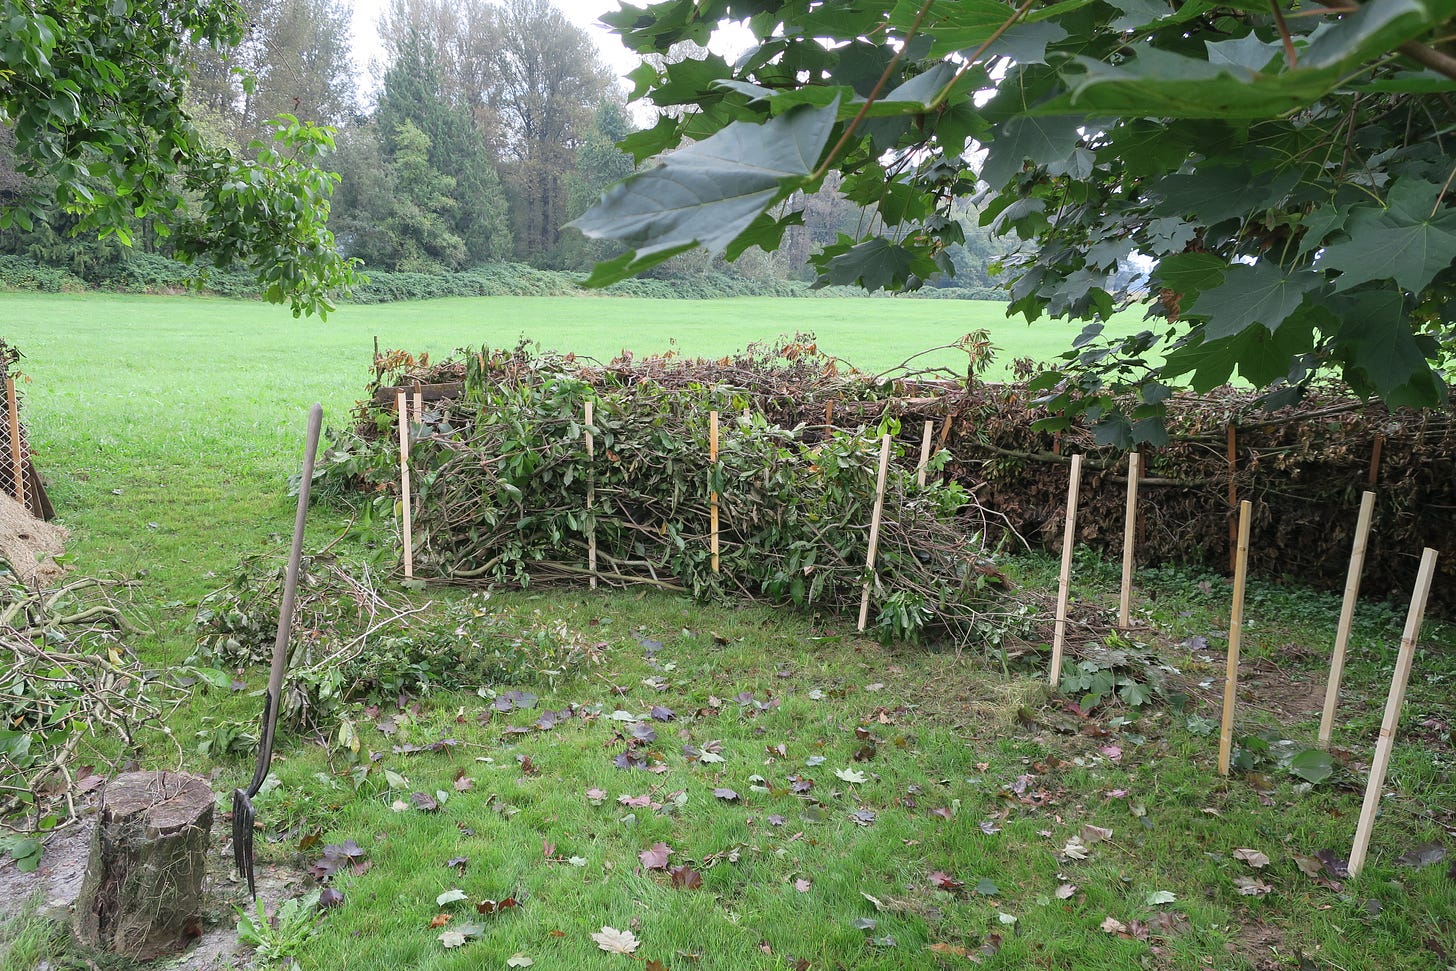
So, although we’d never built one, off we went. We started with a basic construction plan using 1” x 2” x 4’ cedar offcuts and a few basic hand tools (see our earlier post for the details). Placing the stakes about 1 1/2’ apart at opposite intervals, with 3’-4’ spaces between posts. Working in 7’ sections at a time. Adding a new one as the previous one fills up.
We also had a general idea of where we wanted the overall line of the deadhedge to sit in the space. Taking into consideration where we needed to create pass-throughs or avoid obstacles. Just a general, “what if it starts here, curves this way and goes along there?” It’s also important to note that this spot is actually a flood plain, so we did decide to make the entire structure from wood, something that you could adapt if you’re in a landscape prone to wild-fires or other potential challenges.

Then we decided experiment a little. Finding that a 2’ width held just a little more material without compromising anything. We also tried an alternate placement with the stakes and ended up reducing the spacing to 1 1/2’ - 2’, which felt sturdier. Finally we found a local hardware store that carried bundles of ready-made survey stakes, in the size that we were already using. The switch was a no-brainer.
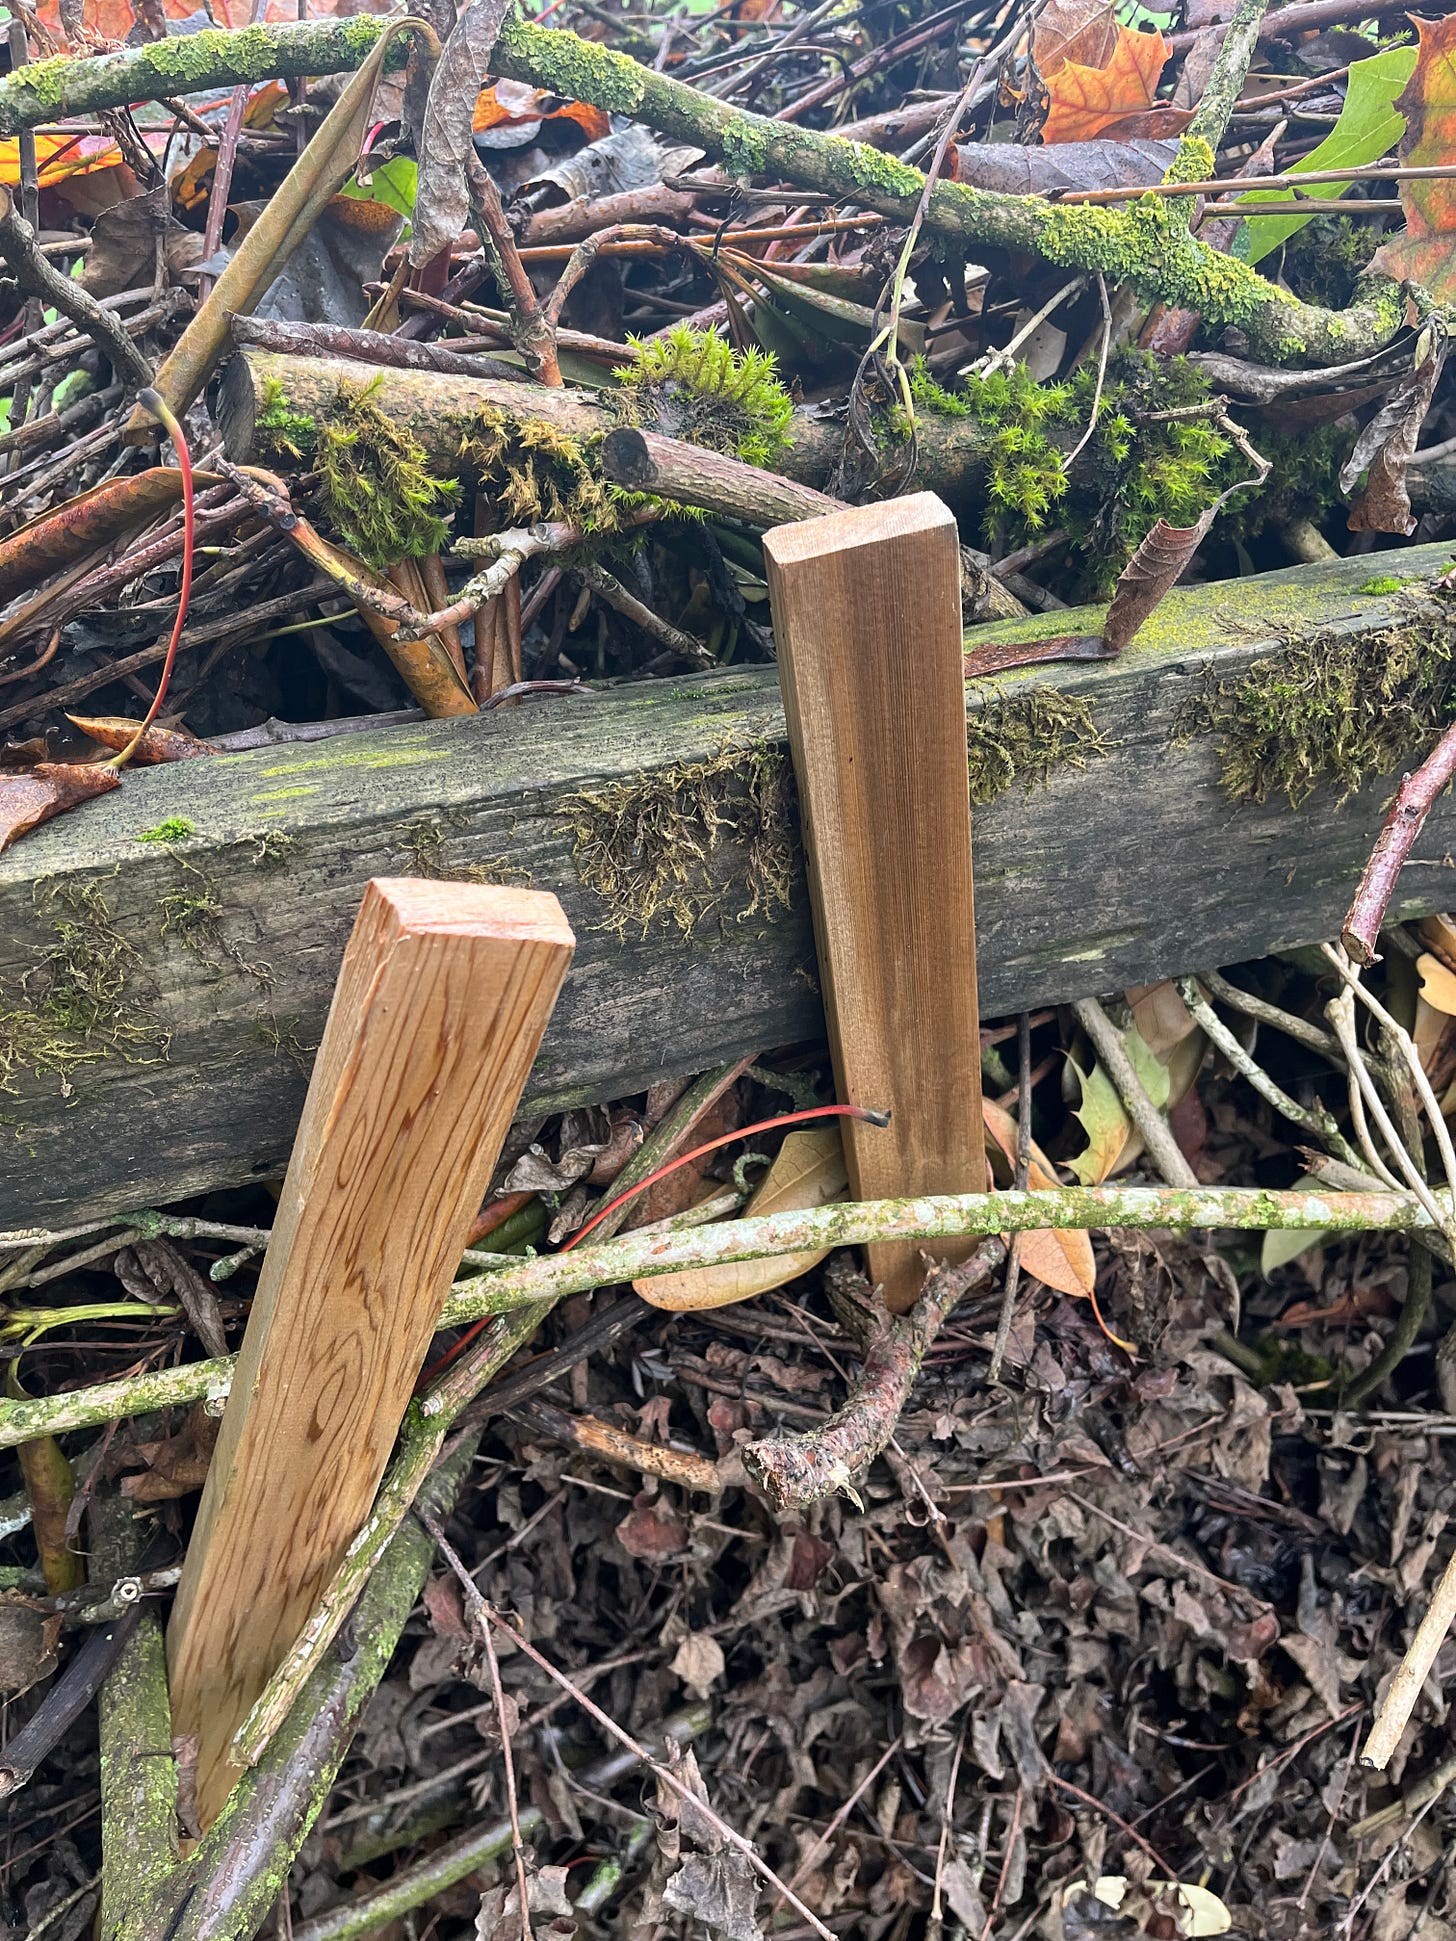
Once we got going, we started separating materials as they piled up. Heavy branches vs twigs and pliable woods vs stiff. We found that keeping the largest and heaviest material for the base was best, since the added weight tends to cause the stakes to bow out near the top.
One form that worked well, was weaving larger branches through the stakes at the base of the deadhedge. Creating a center cavity that’s perfect for loser twigs, cuttings and chunks of root.
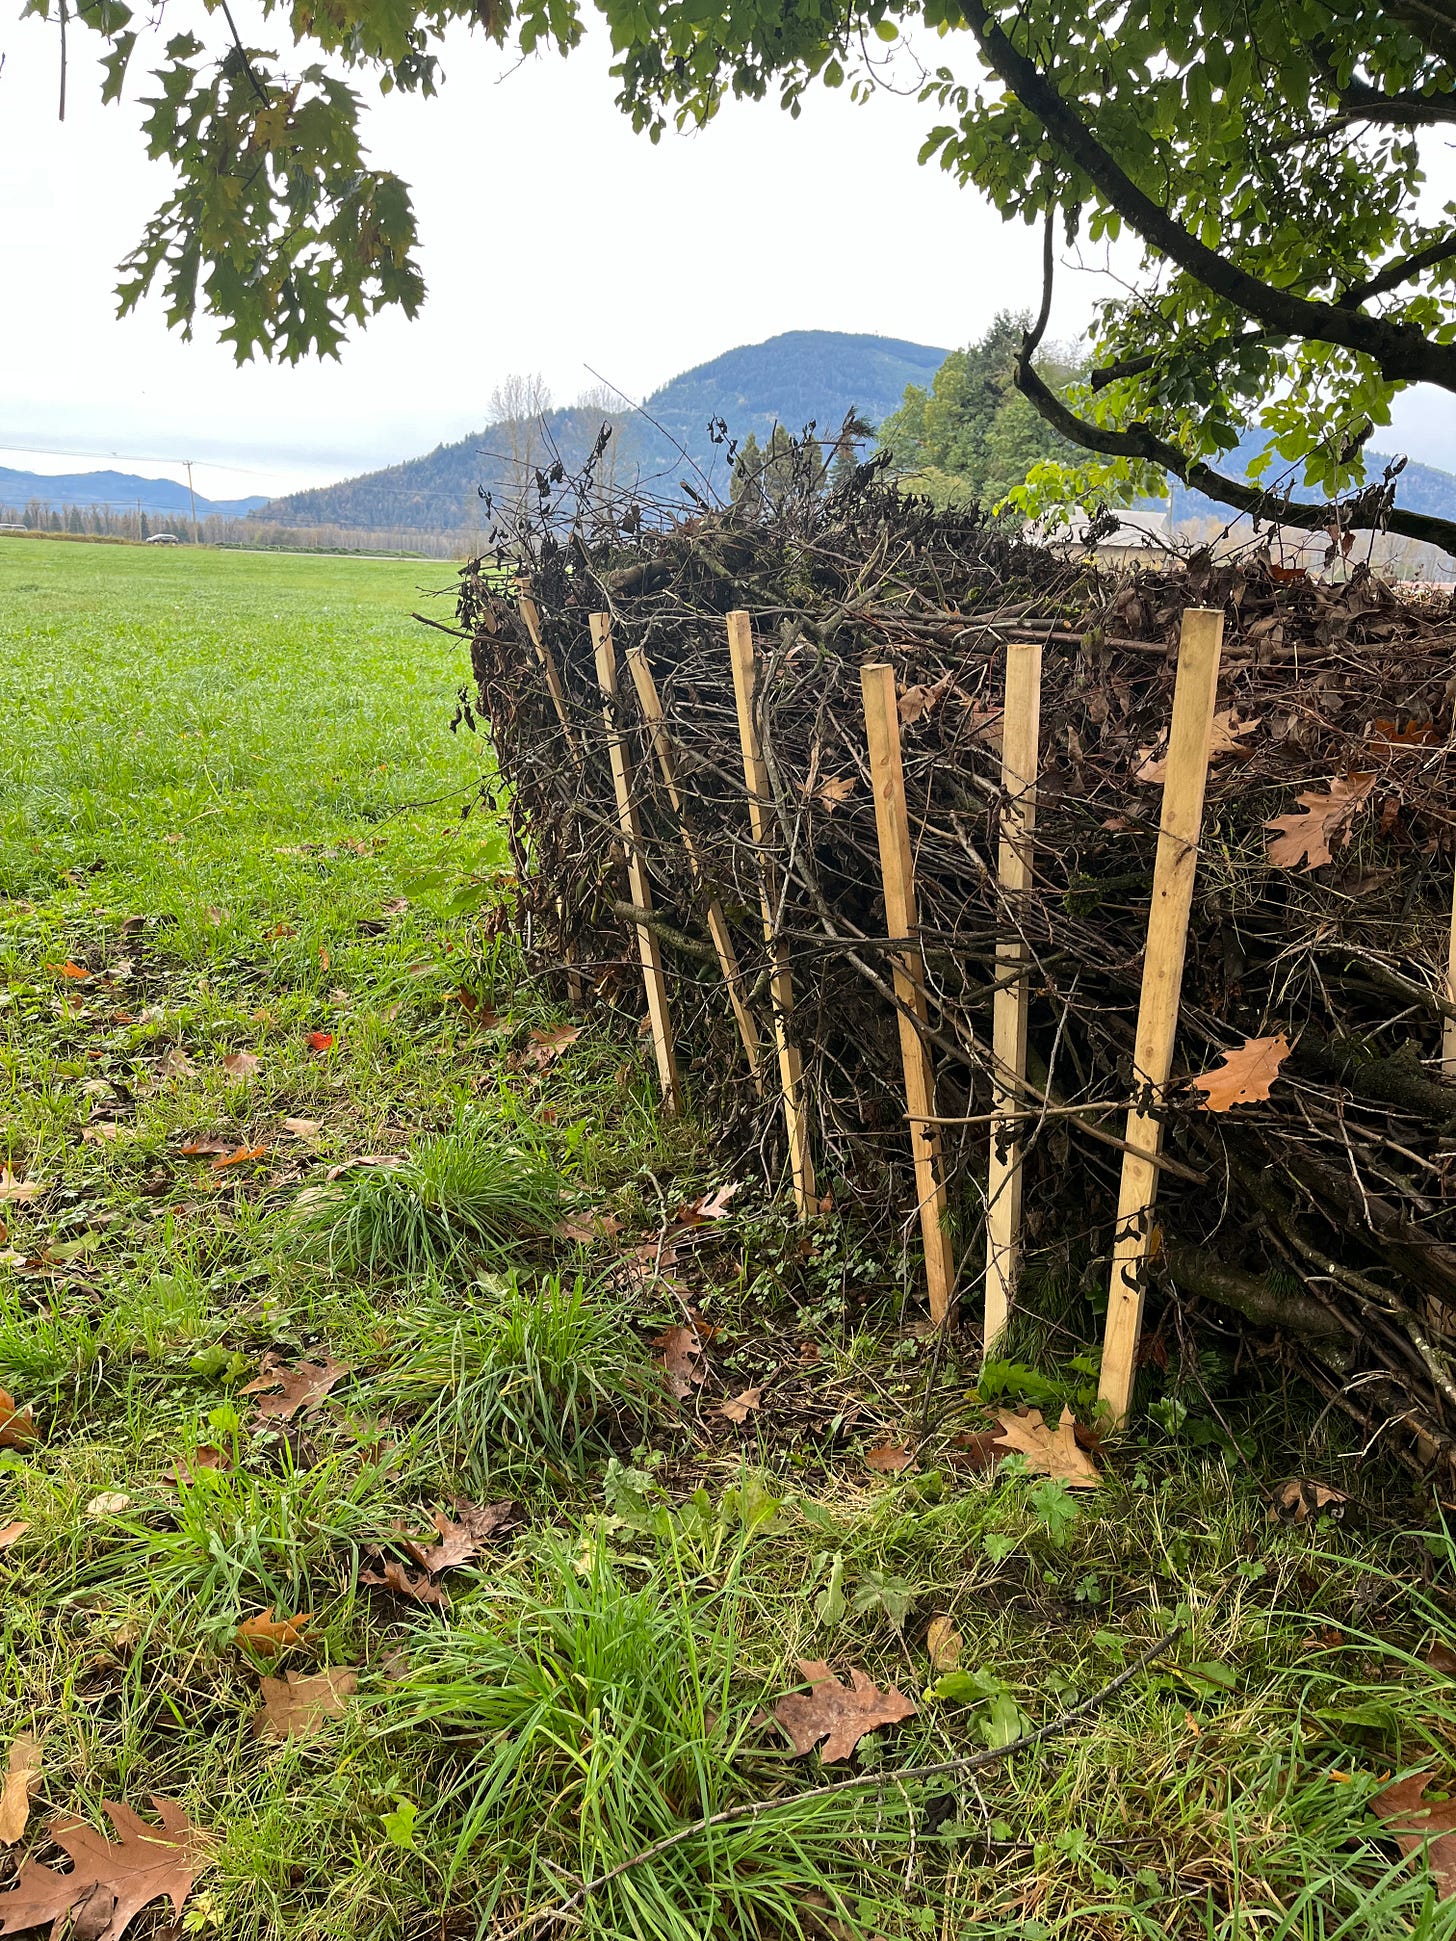
It was also helpful to weave pliable twigs and even small bundles of branches between the stakes and other larger pieces of wood. Tying everything together and adding even more strength to the entire structure. Plus there is just something so innately beautiful about twigs twinning around each other and weaving through the space.
Notably, we did have some firewood chunks hanging around that we use to weigh down and compact lighter material (especially leaves). Leaving them on top of the deadhedge for a few days, before moving the chunks to anothe section and packing in a few more twigs. It really is remarkable just how much material a deadhedge will eat up.

Another tip, is to add extra stakes along any curves, where the weight can cause bowing (unless you like that look, in which case, fill your boots). There’s nothing wrong with leaning into what happens as you work your way along.
And, as soon as the fall rains kicked in, I did spend some time walking around with our mini sledge hammer and pounding in all of the stakes a little more. The moisture in the soil made it just that much easier to secure any slightly wobbly ones.

It was such an enjoyable experience that we ended up adding a extra half-moon section that we turned into a new all-natural compost bin. Replacing an original but temporary one that we had constructed from foraged bits of metal mesh and old snow fencing. The half-circle shape hides the compost piles from view on one side, while keeping them totally accessible from the other.

We started by tapping a post roughly in the center of the half-moon. Tying a bit of garden string on its end and drawing our shape by attaching a can of biodegradable marking paint on the free end. We experimented a little with the scale and placement. And, when it felt right and we’d made sure that we could get a wheelbarrow and any equipment through the openings, we placed our stakes.
In the latest sections, we’ve started to experiment with the length of our stakes. Creating ends that seemingly disappear gradually into the soil. This works well and adds yet another feeling and look to the structure. It’s even more organic and gives a sense of the deadhedge emerging and retreating from the soil. You could easily use this technique to build waves or spirals for added dimension and interest.
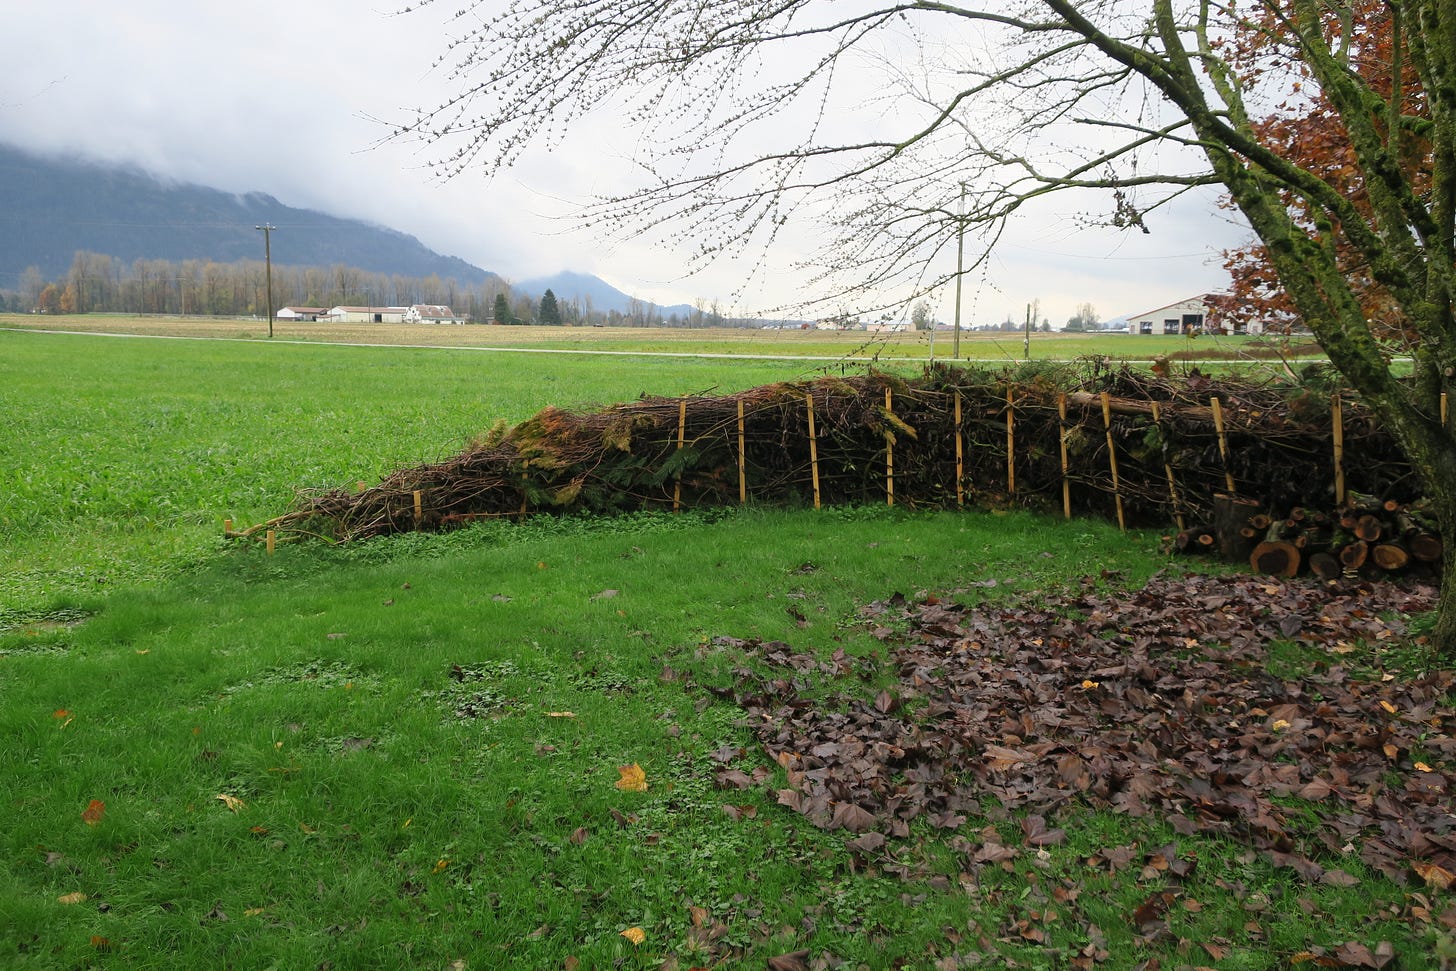
There have been many benefits that came from this experience, some rather unexpected:
an explosion of life (birds, insects and rodents)
the amount of material contained in each section
the added beauty. natural materials, transporting you to a new space. unique look
it’s so easy to build, change, rebuild, fix or add to. There really is no wrong way to do it.
the therapeutic act of building, quietly observing nature while following your creative instincts. Concentrating without judgement. Just taking time, working alone or with others

In short, building a deadhedge was a great project to get started with. It is functional, adaptable, flexible and beautiful. It’s so easy and enjoyable to build. We won’t hesitate to add more in the future.
Thanks for joining us here, as always we’re up for any questions or comments. And would love to hear about your experiences, projects or ideas in the comments.

Sara-Jane at Virens Studio
Virens is a studio located in the greater Vancouver area of Canada’s west coast. We specialize in ecological landscape and planting design and garden writing. So, get in touch today for an idea of how we can add more functional beauty to the greenspaces in your life.


Beautiful! It makes so much sense to keep the material to slowly biodegrade on the land, yet look tidy. Did you have any suggestions for areas prone to wildfires?
Looks great! How long did it take?